How to connect eduroam in Windows 11
1. From the Windows 11 Start screen or the Desktop
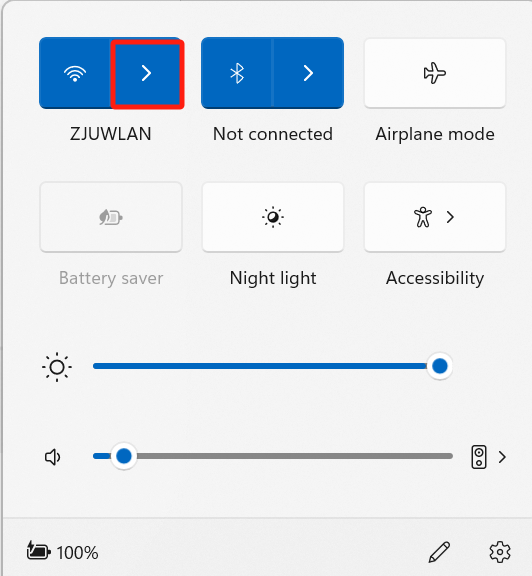
Locate the Wireless icon in the task bar (bottom right corner)
Click on the Wireless icon

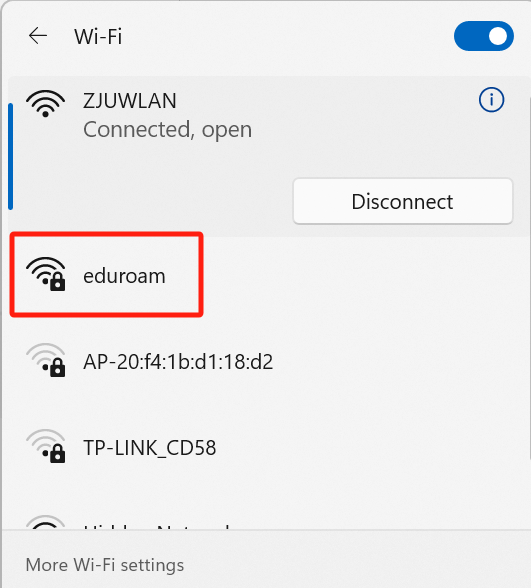
2. A list of connections will be displayed
Ensure the WIFI coverage
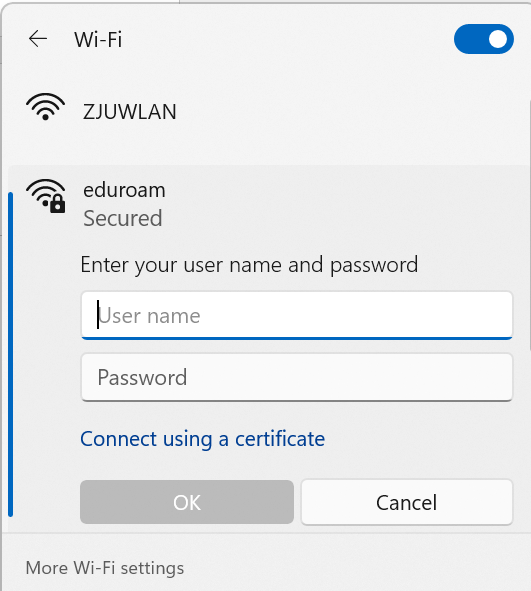
Click on the connection and enter the INTL ID and password
If the wireless SSID cannot be searched after confirming that the network card settings are normal
1. Search control panel in the menu bar and enter ‘Control Panel’
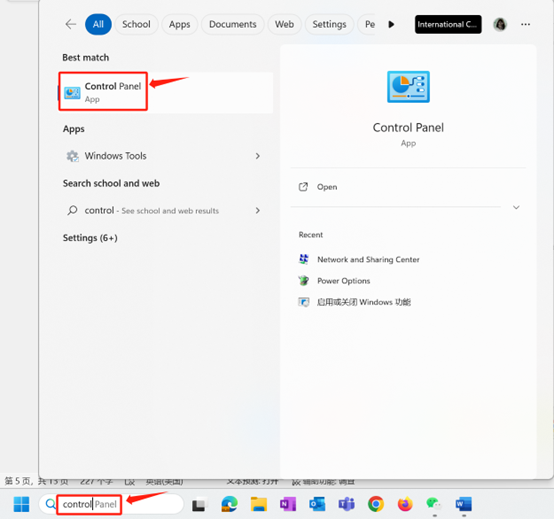
2. Select ‘Network and Internet’ in 'Control Panel'
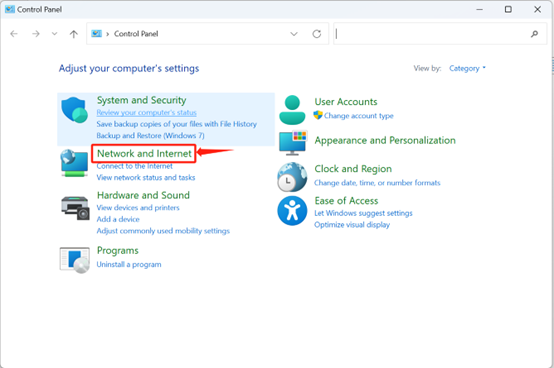
3. Select ‘Network and Sharing Center’ in ‘Network and Internet’
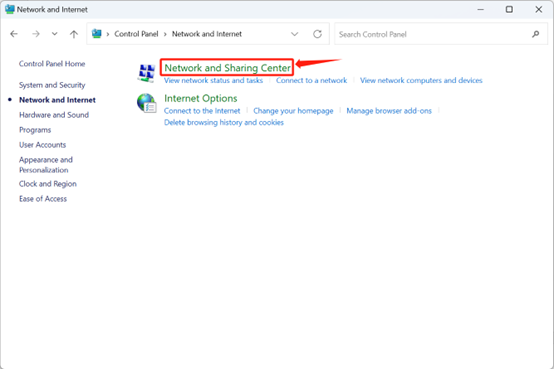
4. Select ‘Set up a new connection or network’ in ‘Network and Sharing Center’
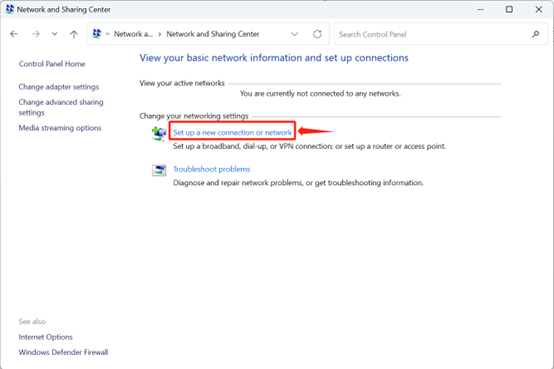
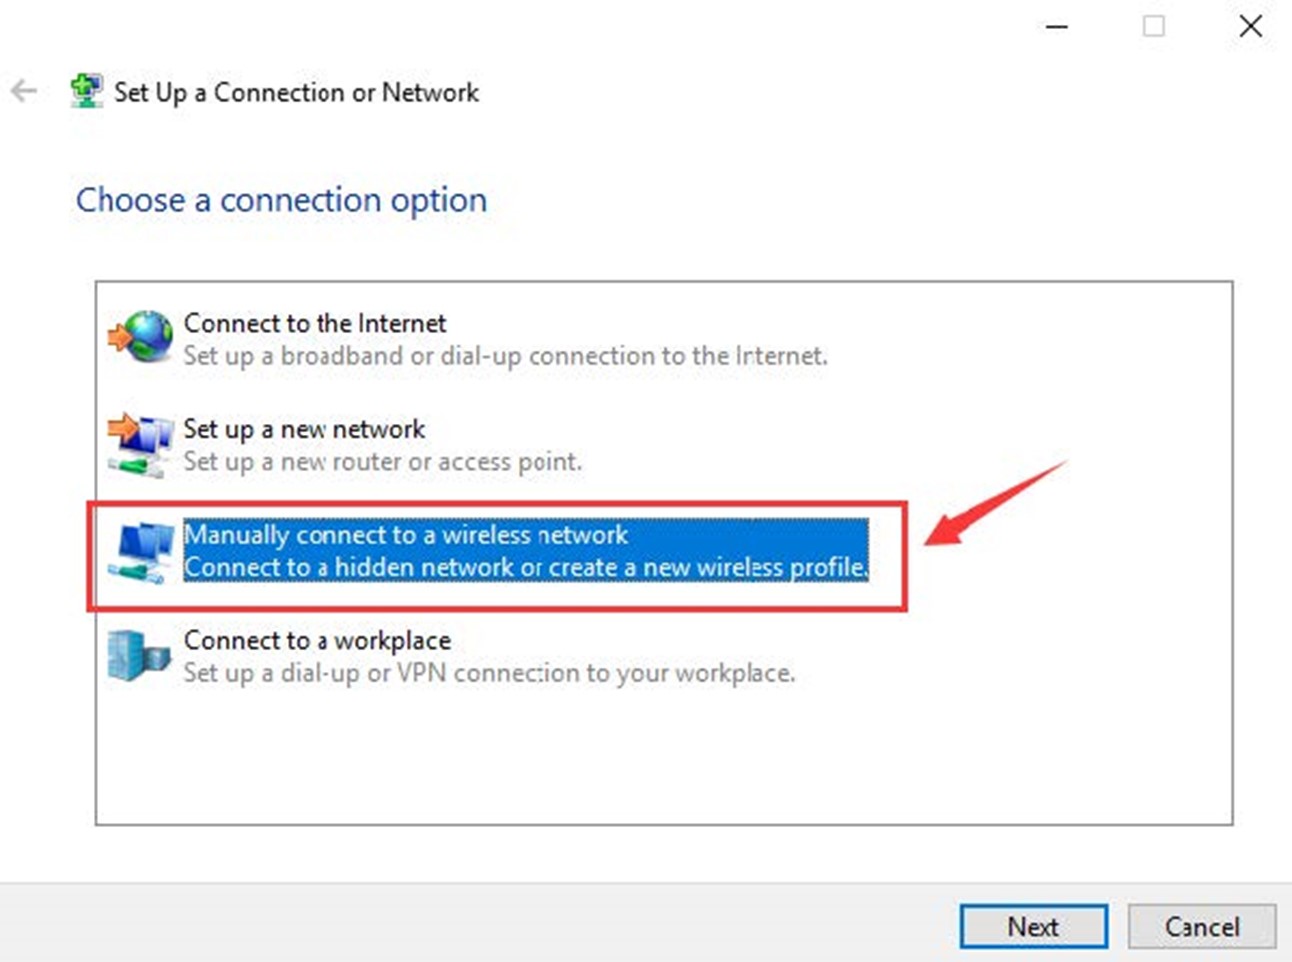
5. Select ‘Manually connect to a wireless network’
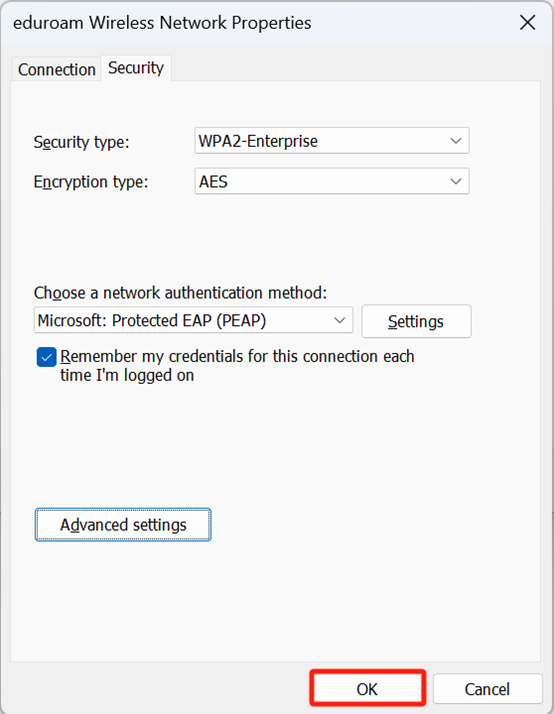
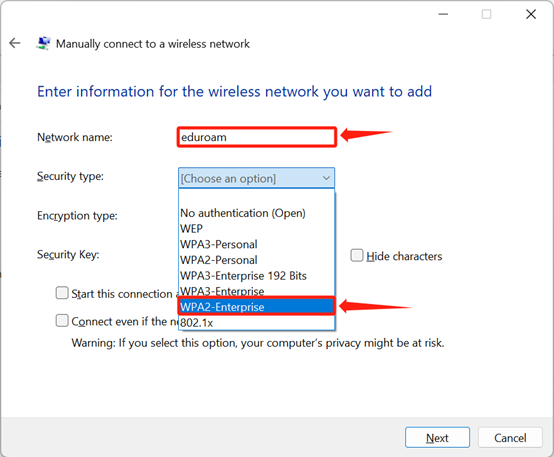
6. Change the Network name to eduroam, change Security type to WPA2-Enterprise
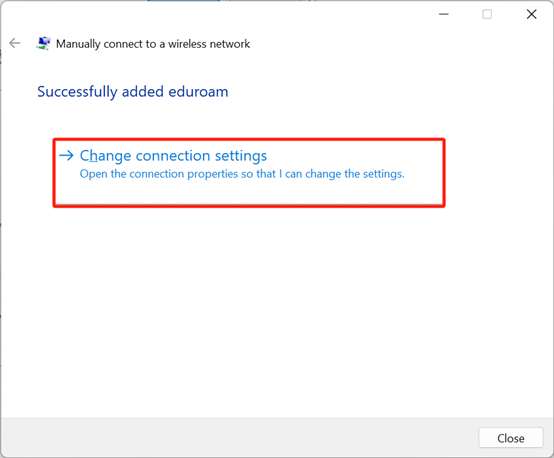
7. Select ‘Change connection settings’
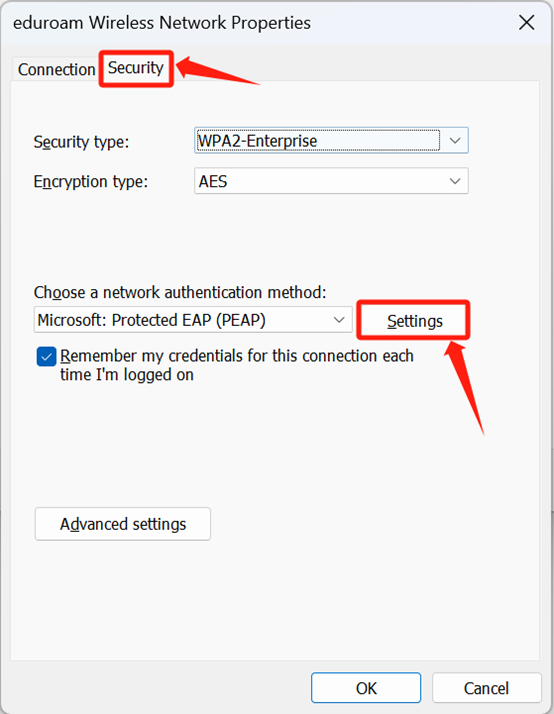
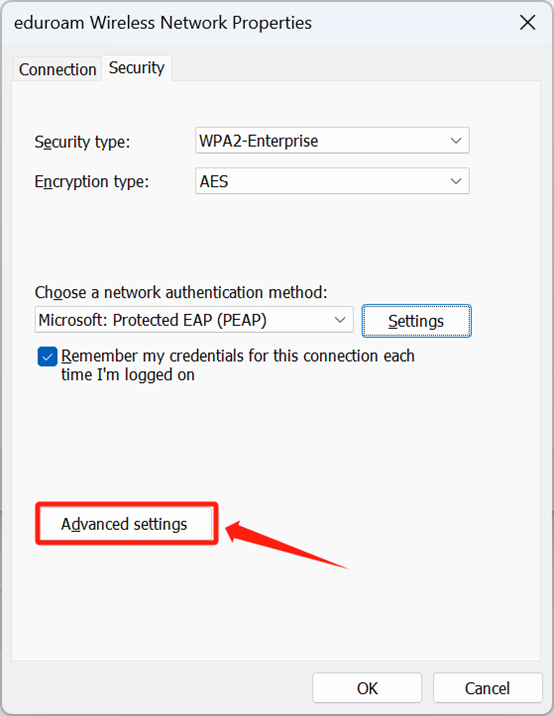
8. Select ’Security’ and choose ‘Settings’
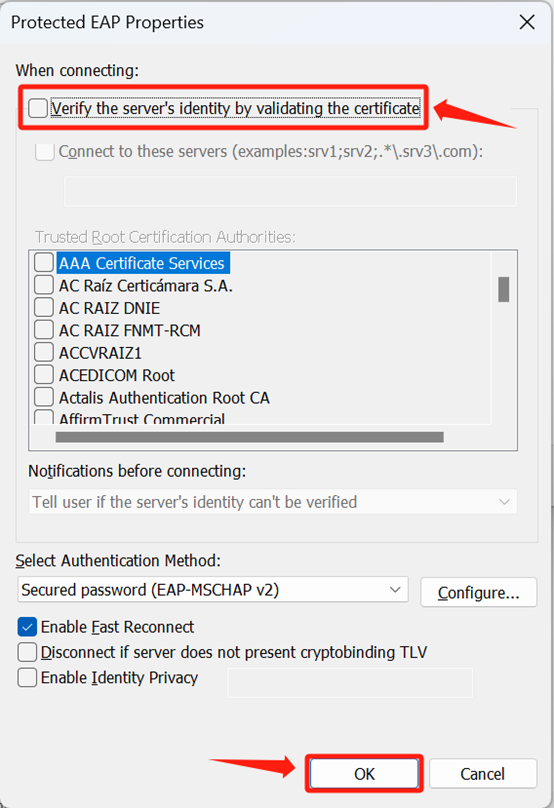
9. Cancel the ‘ √’ of ‘Verify the server’s identity by validating the certificate’and click ‘OK’
10. Choose ‘Advanced settings’
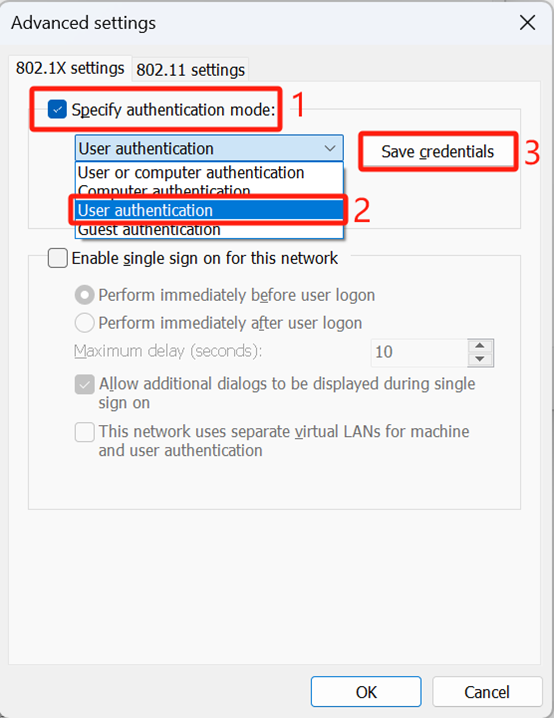
11. Click ‘Specify authentication mode’, choose ‘User authentication’ and‘Save credentials’
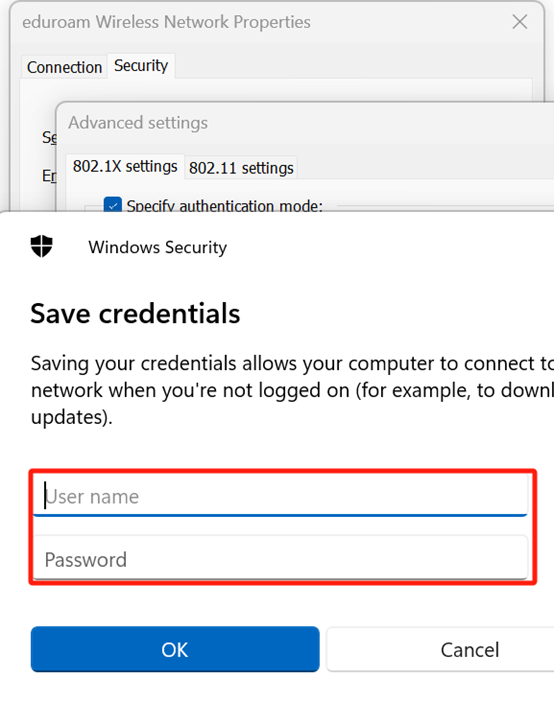
12. Enter your INTL ID and password then press ‘OK’
13. press ‘OK’to finish the settings.
